
Choosing between 3Y, 4Y, or 5Y zirconia requires you to evaluate the clinical case’s connector requirements and mechanical load, rather than relying on manufacturer-driven marketing. Imagine finishing a highly aesthetic anterior bridge, only to have the patient return three months later with a catastrophic fracture through the connector. It is incredibly frustrating to explain to both the patient and the referring dentist why a beautiful restoration failed. You face wasted bench time, remakes, and damaged clinical trust—all because marketing materials promised “universal” aesthetics and strength. The key to preventing these failures is understanding the chemical and mechanical reality of 5Y Zirconia and its siblings, selecting your material based on concrete geometry and stress limits rather than sales brochures.
What is the real difference between materials and 5Y Zirconia?
The real difference lies in the level of yttria stabilization, which directly dictates the phase composition and physical limits of the material. As you increase yttria content to create 5Y Zirconia, you trade structural fracture toughness for optical translucency. This means that a single block cannot serve as a truly universal material for every clinical scenario.
Understanding the crystalline phases is crucial to navigating this trade-off. By looking at how these phases react under functional stress, you can avoid design flaws before they reach the milling machine.
What does the “Y” stand for?
Yttria stands for yttrium oxide (Y₂O₃), which is added as a dopant to stabilize the zirconium dioxide (ZrO₂) crystal structure at room temperature. Without this stabilizer, the material would undergo rapid phase transformation during cooling, expanding in volume and cracking catastrophically.
Think about it:
- Pure zirconia exists in monoclinic, tetragonal, and cubic phases depending on temperature.
- Stabilizing agents keep the tetragonal and cubic phases locked in at room temperature.
- This stabilization prevents spontaneous volume changes under mechanical stress.
How do 3Y, 4Y, and 5Y differ?
The fundamental difference between these classes is the molar percentage of yttria, which directly alters the ratio of crystal phases. While 3Y contains a fully tetragonal structure that yields maximum mechanical strength, 5Y introduces a significant amount of isotropic cubic crystals.
The catch?
- 3Y zirconia remains highly tetragonal, maintaining maximum flexural strength.
- 4Y serves as an intermediate phase with balanced properties.
- 5Y contains up to 50% cubic phase, reducing its ability to stop crack propagation.
Is there a single perfect material?
There is no single universal material that can satisfy both extreme aesthetic and high-stress structural demands simultaneously. Standard physical laws dictate that as translucency increases through higher yttria addition, strength naturally declines.
Look:
- You must select your block based on the specific clinical indications of the case.
- High-stress regions demand structural integrity over optical translucency.
- Aesthetic zones allow you to utilize higher translucency at the cost of flexural strength.
Key Takeaway: Understanding the physical compromise between 3Y, 4Y, and 5Y lets you choose materials based on biological reality rather than marketing claims, ensuring long-term restoration survival.
| Material Class | Yttria Content (mol %) | Translucency (%) | Crystal Phase Configuration |
|---|---|---|---|
| 3Y Zirconia | ~3 mol % | 35% – 40% | 100% Tetragonal |
| 4Y Zirconia | ~4 mol % | 41% – 45% | Partially Tetragonal / Cubic |
| 5Y Zirconia | ~5 mol % | 45% – 50%+ | 50% Cubic / 50% Tetragonal |
Analytical Guide: Evaluate the specific mechanical requirements of the restorative site before choosing between tetragonal strength and cubic translucency.
Why does yttria content matter so much for 5Y Zirconia?
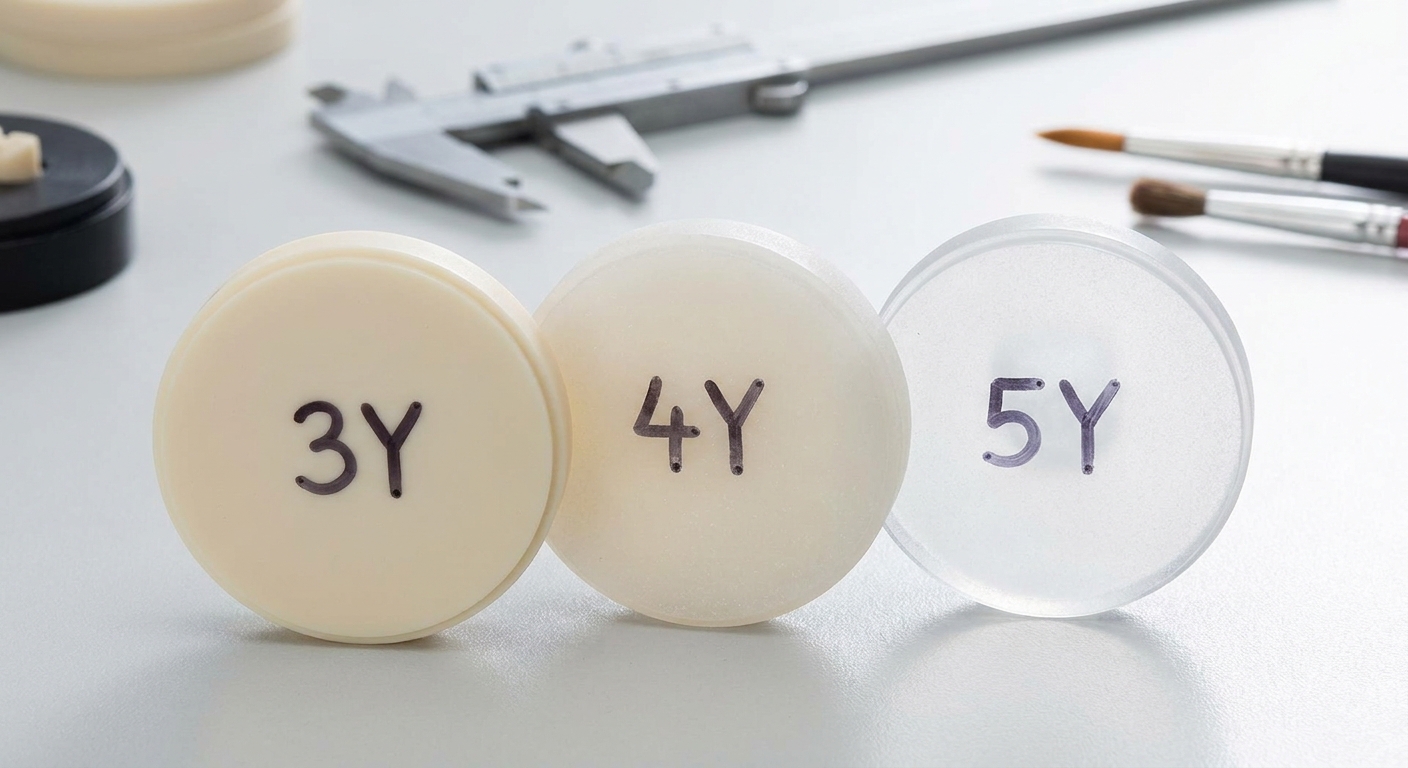
Yttria content matters because it alters the grain structure and eliminates the transformation-toughening mechanism that protects the restoration from failure. When you work with 5Y Zirconia, the high concentration of cubic crystals renders the material more brittle and prone to micro-chipping. This lack of phase transition means you must handle the material with extreme precision.
To get the most out of high-yttria materials, you must design preparations that compensate for the lower fracture resistance. Understanding the optical and mechanical consequences of this grain structure helps you predict clinical behavior.
How does yttria affect phase stability?
Phase stability is directly influenced by the concentration of yttria, which prevents the stress-induced transition from tetragonal to monoclinic. While 3Y zirconia halts crack propagation by expanding its local volume to squeeze the crack shut, 5Y lacks this capacity.
The catch?
- Higher yttria locks the crystal structure into a stable cubic phase.
- This prevents phase transformation toughening under masticatory stress.
- Cracks can propagate through the material without encountering structural resistance.
Why does higher yttria reduce strength?
The inclusion of isotropic cubic crystals reduces the overall flexural strength because these larger crystals cannot stop micro-fractures from expanding. This structural change drops the fracture toughness of the material by half compared to traditional tetragonal formulations.
Think about it:
- Cubic crystals lack the anisotropic refractive properties that scatter stress.
- Lower fracture toughness makes the margins highly vulnerable during milling.
- Edge-chipping becomes much more common in high-yttria blocks.
What makes 5Y highly translucent?
High translucency is achieved because the cubic crystals are isotropic, meaning they allow light to pass through in all directions without refracting or scattering at grain boundaries. This gives the material an optical density that closely matches human enamel.
Look:
- Reduced light scattering eliminates the chalky, opaque look of older restorations.
- The material absorbs and reflects surrounding shades to create a chameleon effect.
- This allows you to achieve elite aesthetics with simple surface stains and glaze.
Key Takeaway: While high yttria yields unparalleled natural light transmission, it completely removes the material’s defense mechanism against cyclic fatigue, demanding conservative handling.
| Phase State | Yttria Level | Toughness (MPa·m¹/²) | Light Transmission Class |
|---|---|---|---|
| Tetragonal | Low (~3Y) | 6.0 – 8.0 | Opaque / Semi-Translucent |
| Cubic / Tetragonal | High (~5Y) | 2.5 – 3.5 | High Translucency |
Analytical Guide: Use high-yttria materials only when the optical demands of the anterior zone outweigh the requirement for high fracture toughness.
Is 5Y Zirconia strong enough to restore posterior teeth?
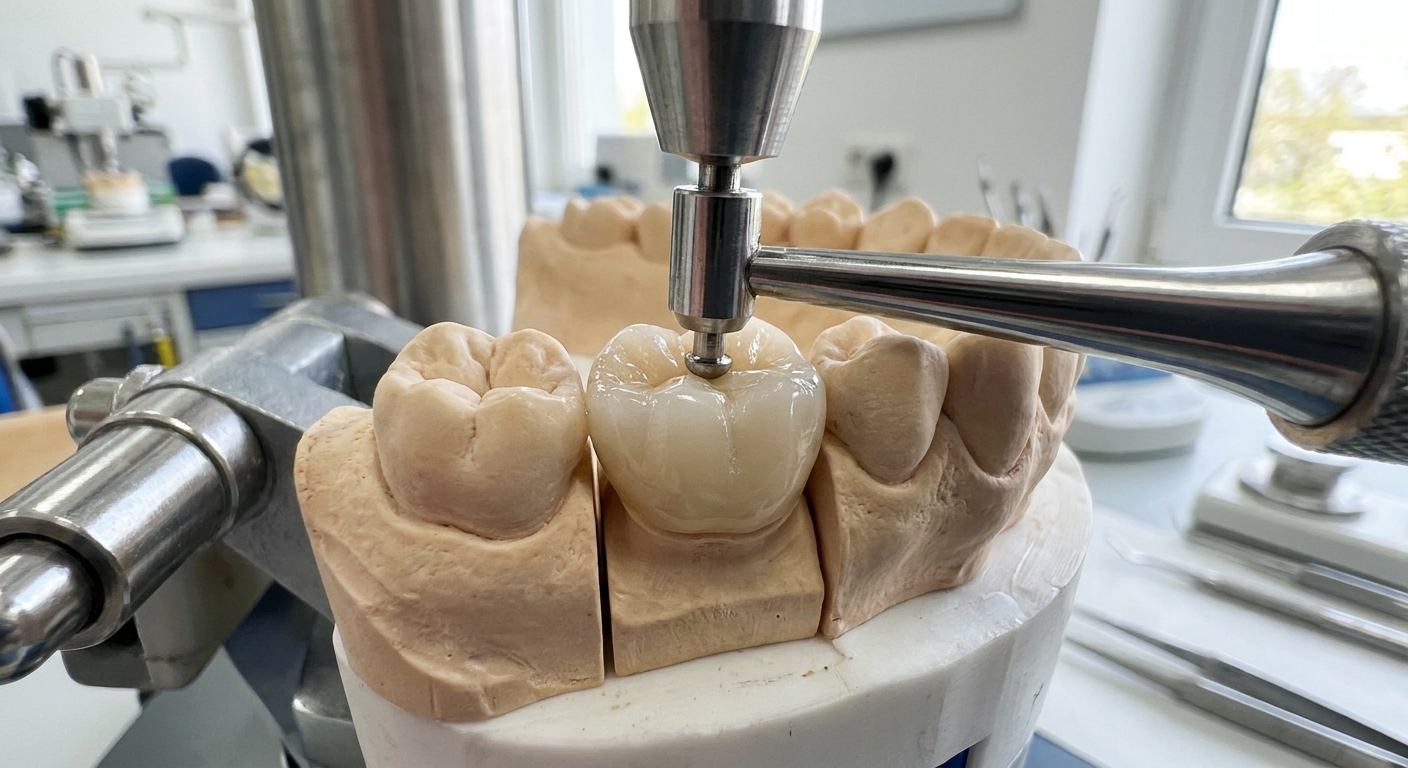
In most high-stress clinical scenarios, 5Y Zirconia is not strong enough to withstand posterior masticatory forces safely. Posterior restorations are subjected to complex multidirectional stress and cyclic loading that easily exceed the material’s lower fracture limits. Using it in the molar region without strict prep design is a recipe for early failure.
When clinicians demand monolithic aesthetics in the posterior, you must guide them toward safer material alternatives or modify their preparation guidelines. Failing to address these force requirements leads directly to catastrophic bulk fractures.
What is the risk of posterior micro-cracking?
The primary risk in the molar region is the accumulation of subcritical micro-cracks under cyclic loading. As masticatory forces routinely exceed hundreds of Newtons, these invisible micro-cracks propagate over time, leading to sudden catastrophic fracture.
Look:
- Monolithic restorations must be designed with sufficient bulk to compensate for lower toughness.
- Sharp preparation angles focus stress and initiate internal cracks.
- Repetitive chewing cycles accelerate material fatigue in low-strength zones.
When should you avoid high-yttria zirconia?
You should strictly avoid using high-yttria materials in patients with severe bruxism, parafunctional habits, or when preparing multi-unit posterior bridges. In these cases, the risk of structural failure far outweighs any minor aesthetic advantages.
The catch?
- Bruxers generate forces that can easily exceed the material’s flexural threshold.
- Long-span frameworks do not possess the necessary elasticity to resist flexing.
- Non-axial loads on under-reduced teeth will quickly shear the restoration.
Can single posterior units use high-yttria?
Single posterior crowns can succeed only if you follow rigorous clinical preparation guidelines and transition to adhesive bonding protocols. The restoration must have a generous occlusal reduction to ensure adequate material thickness.
Think about it:
- You need at least 1.0 to 1.5 mm of occlusal reduction for safety.
- Conventional luting cements do not reinforce the restoration like resin bonding.
- Clear communication with your clinical partners about preparation requirements is vital.
Key Takeaway: Restricting high-yttria materials to single posterior units with ideal preparation and adhesive bonding protects your lab from costly remakes and clinical failures.
| Occlusal Reduction | Recommended Cementation | Indication Limits | Risk Factor |
|---|---|---|---|
| < 1.0 mm | Conventional GI Luting | Contraindicated | Extremely High |
| 1.0 – 1.5 mm | Adhesive Resin Bonding | Single Units Only | Acceptable |
| > 1.5 mm | Adhesive Resin Bonding | Single Units Only | Low |
Analytical Guide: Ensure minimum wall thicknesses are verified in the CAD software before committing to milling a posterior restoration in a high-yttria material.
How does the translucency of 5Y Zirconia affect aesthetics?
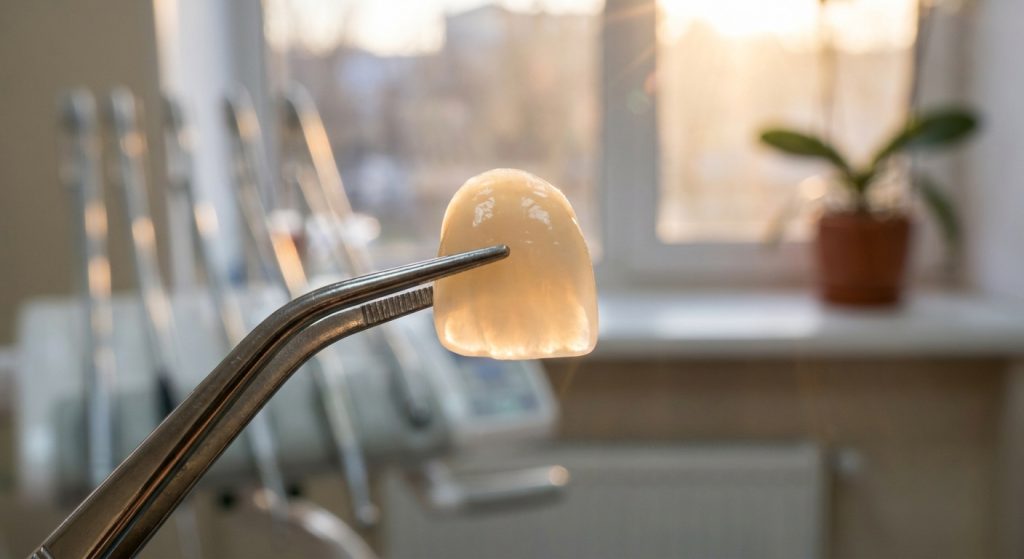
The high translucency of 5Y Zirconia allows it to transmit light deep into the restoration, replicating the optical properties of natural dentin and enamel. However, this high light transmission can also let dark underlying tooth structure or metallic posts bleed through. Balancing this aesthetic behavior requires you to coordinate closely with the clinical operatory.
Older generations of zirconia often look flat and artificial when placed next to natural teeth, prompting labs to rely on complex staining techniques. Modern high-translucency formulations solve this depth issue but introduce new substrate-masking challenges.
Why does 3Y look flat in the anterior zone?
Traditional 3Y looks flat because its fully tetragonal microstructure scatters light heavily, preventing deep optical pathing. This creates an opaque, high-value core that blocks natural tooth dynamics.
The catch?
- Tetragonal grains act as light barriers, reflecting illumination from the outer surface.
- This prevents the restoration from absorbing adjacent tooth color.
- Achieving natural depth requires complex and time-consuming manual ceramic layering.
How does light transmission mimic natural enamel?
High-yttria materials let light penetrate deep into the body of the restoration, blending with the surrounding dentition. By integrating optimized trace oxides, modern formulations display natural opalescence under changing light.
Look:
- The chameleon effect naturally softens the margins of your crown.
- Light penetrates the incisal edge to create realistic halo effects.
- You can skip complex cutback workflows and finish crowns with simple external glaze.
Can prep shade bleed through high-yttria?
Yes, high light transmission means that dark abutments, metallic cores, or discolored endodontic posts will show through the restoration. You must manage this value drop by matching material thickness or selecting a more opaque core.
Think about it:
- A severely discolored prep (e.g., ND9) will ruin a translucent monolithic crown.
- You need to demand stump shades from the dentist before selecting the block.
- Opaquer primers or specialized cements can help mask slight discolored substrates.
Key Takeaway: High-yttria restorations provide unmatched aesthetic depth when placed over favorable substructures, but they require careful management of underlying preparation shades to prevent value loss.
| Prep Shade Class | Recommended Material Thickness | Masking Requirement | Aesthetic Outcome |
|---|---|---|---|
| Ideal (ND1 – ND3) | 1.0 mm | None | Excellent |
| Moderately Dark (ND4 – ND6) | 1.2 – 1.5 mm | Opaque Resin Cement | Good |
| Severely Dark (ND7 – ND9) | Contraindicated (use opaque core) | High-Opaque Core | Poor (if unmasked) |
Analytical Guide: Analyze the clinical stump shade during the case design phase to prevent unexpected aesthetic shifts after final cementation.
Why is connector dimension the ultimate guide for 5Y Zirconia?
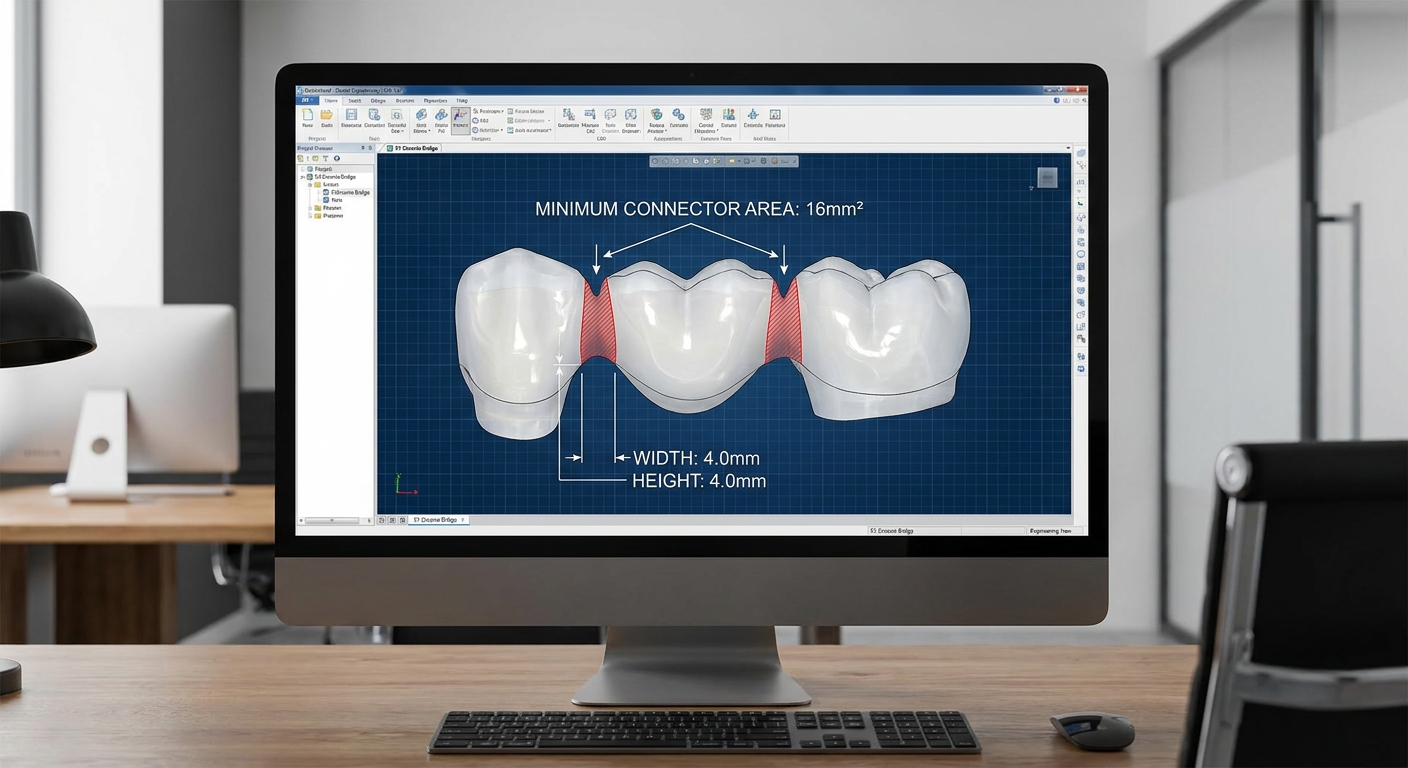
Connector dimensions are the ultimate guide because they determine the physical threshold where stress concentrations will initiate catastrophic framework failure. When dealing with 5Y Zirconia, your connector size must be significantly larger than what is required for traditional 3Y materials. Ignoring these geometry rules will result in fractures during functional chewing.
When designing multi-unit bridges in CAD/CAM software, default configurations can mislead you into choosing unsafe connector sizes. Understanding the cubic relationship between height and bending stress prevents these failures.
What are the minimum connector dimensions?
The minimum cross-sectional area of a bridge connector is dictated by the mechanical properties of the chosen material generation. Height is the most critical dimension because stress increases exponentially as the vertical dimension is reduced.
Think about it:
- 3Y zirconia requires a posterior connector of only 9 mm².
- 4Y zirconia increases that minimum requirement to 12 mm².
- 5Y zirconia requires a minimum of 16 mm², which is often clinically impossible to fit.
How does span length influence connector size?
As the span length increases, the flexing forces acting on the bridge connectors increase cubically, requiring a massive increase in structural support. Long spans generate high leverage on the connectors next to the pontic.
Look:
- Doubling the span length increases deflection by eight times under the same load.
- Long-span frameworks in high-yttria materials are highly prone to structural fatigue.
- Keep high-translucency materials strictly limited to single units or short-span anterior bridges.
Why do bridges fail at the connector?
Bridges fail at the connector because tensile stress concentrates at the gingival embrasure where the restoration is under tension. CAD software often defaults to narrow, sharp embrasures that act as notch-stress concentrators.
The catch?
- Sharp transitions initiate micro-cracks that quickly spread under load.
- Beautiful designs on screen often bypass real-world physical limits.
- You must manually round out your connector designs to distribute stress evenly.
Key Takeaway: Designing with generous, rounded connector areas is the single most critical factor in preventing multi-unit bridge failures when using high-yttria materials.
| Material Generation | Anterior Connector Size | Posterior Connector Size | Max Span Length Allowed |
|---|---|---|---|
| 3Y Zirconia | 7 mm² | 9 mm² | Multi-unit long-span |
| 4Y Zirconia | 9 mm² | 12 mm² | 3-Unit short-span |
| 5Y Zirconia | 12 mm² | 16 mm²(Restricted) | Single units preferred |
Analytical Guide: Verify that your CAD software connector dimensions are set to absolute physical values rather than default cosmetic recommendations.
Can multilayer discs solve the trade-off of 5Y Zirconia?
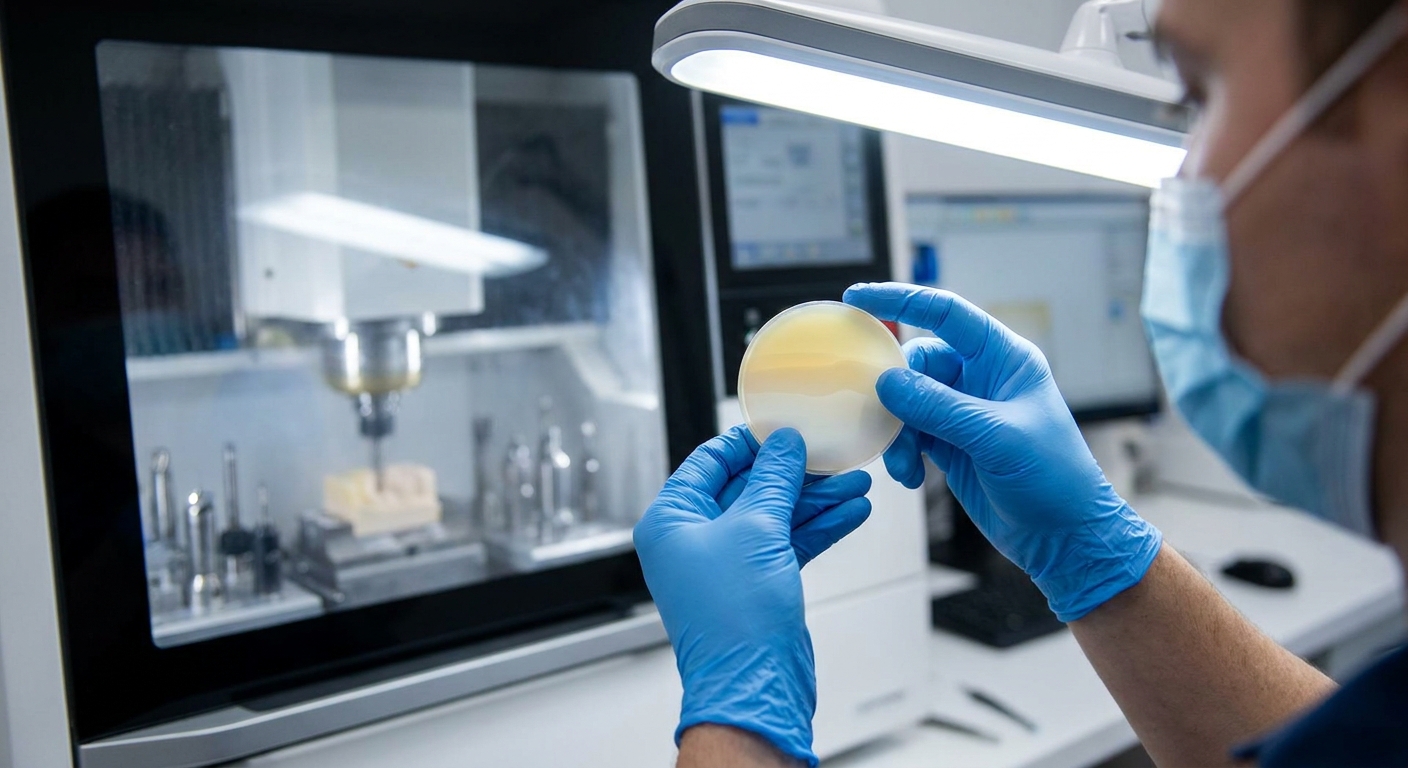
Multilayer discs can solve the trade-off by transitioning from a high-strength tetragonal base to a highly aesthetic cubic incisal zone within a single puck. This continuous material gradient allows you to design a restoration that features high fracture resistance at the margins and high light transmission at the incisal edge. However, this architecture requires careful nesting in your CAM software.
Older multi-layered discs featured harsh boundaries that compromised both strength and aesthetics. Modern gradient engineering allows the material to transition smoothly, eliminating these failure planes.
What is a graded multilayer structure?
A graded multilayer disc uses a smooth, continuous transition of yttria content throughout its thickness, rather than separate, distinct layers. This chemistry gradient matches the physical properties of natural dentin and enamel.
Look:
- The cervical area maintains high-strength 3Y or 4Y properties.
- The incisal layer offers the premium aesthetics of 5Y formulations.
- Co-precipitated powders ensure uniform shrinkage during sintering to prevent warping.
Do transition lines ruin the final result?
Transition lines will ruin the restoration if you use older, stepped-layer technology where distinct boundaries are visible under light. Modern graded discs eliminate these lines by blending the raw powders continuously.
The catch?
- Stepped boundaries create internal shear stress planes inside the material.
- These interfaces can delaminate under high chewing forces.
- Sharp aesthetic lines become glaringly obvious to the patient after staining.
How does the yttria gradient distribute load?
The yttria gradient distributes load biomimetically by ensuring the high-strength material sits where tensile forces concentrate during function. This design protects the weaker, highly translucent incisal zones from chipping.
Think about it:
- Stresses from preparation margins are absorbed by the tough cervical base.
- The aesthetic layer is loaded primarily under low-stress compressive force.
- This structural layout allows you to expand the indications of high-translucency materials.
Key Takeaway: Utilizing graded multilayer discs allows your laboratory to achieve natural anterior aesthetics without sacrificing the critical marginal strength required for long-term clinical success.
| Disc Architecture | Sintering Shrinkage | Strength Distribution | Transition Visibility |
|---|---|---|---|
| Discrete Layered | Uneven (risk of warping) | Stepped / Abrupt | High (visible bands) |
| Graded Multilayer | Uniform | Continuous Gradient | Indistinguishable |
Analytical Guide: Choose continuous-gradient discs over stepped-layer alternatives to prevent internal stress lines and visible color transitions.
How does nesting height affect 5Y Zirconia aesthetics?
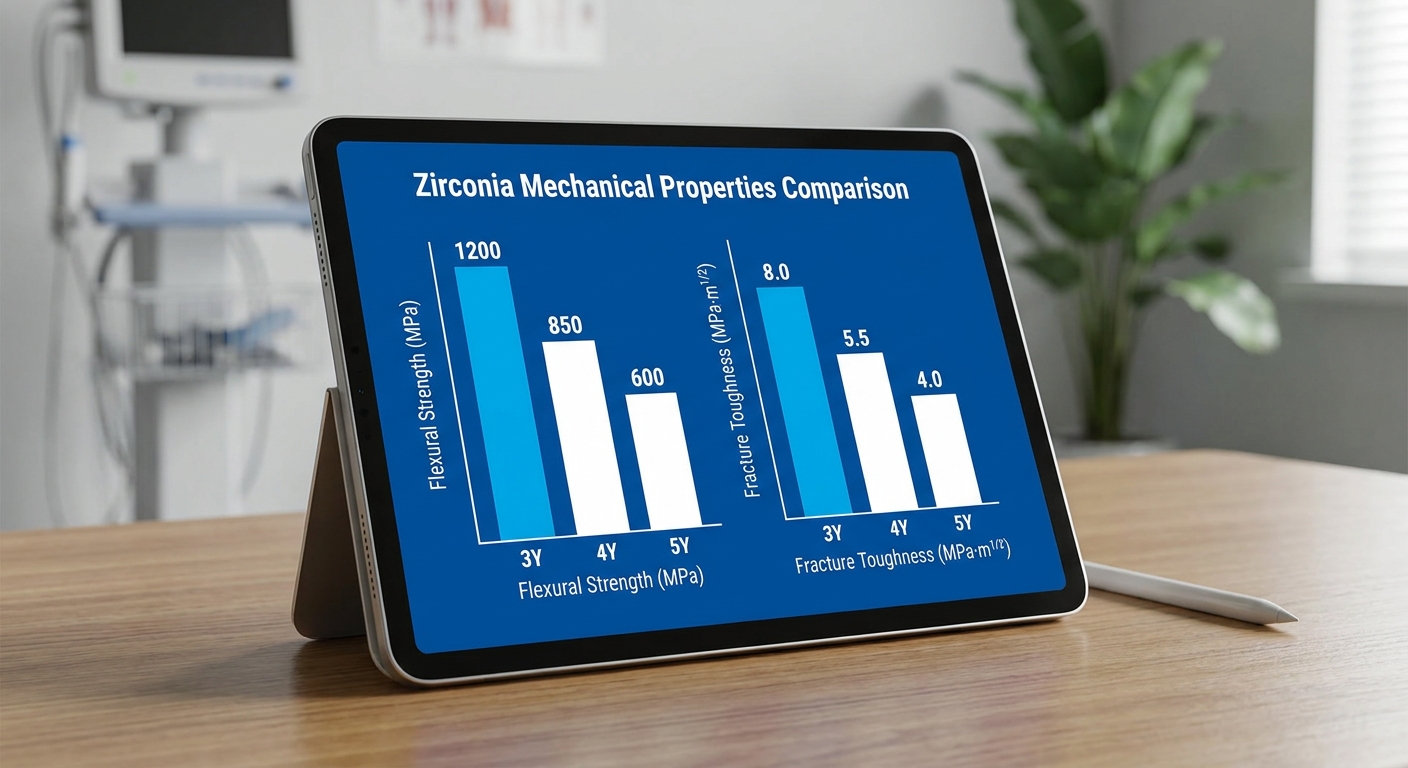
Nesting height directly determines the aesthetic and mechanical outcomes because it positions the restoration within the different yttria zones of a graded disc. If you nest a crown too low, you will end up with an opaque incisal third that looks flat and lifeless in the mouth. By mastering your CAM nesting protocols, you can unlock the full potential of 5Y Zirconia gradient technology.
Arbitrary positioning inside the CAM software can compromise both the strength of your margins and the transparency of your incisal edge. Visualizing the internal layout of the gradient prevents these errors.
Where should you place the incisal edge?
You must place the incisal edge at the top-most surface of the multilayer disc to capture the highest concentration of cubic, highly translucent material. This area contains the highest yttria concentration, which is designed to mimic natural enamel.
Think about it:
- The top 2 to 3 mm of the disc is formulated for optimal light transmission.
- Placing the incisal edge lower down shifts the aesthetic zone into the opaque body.
- Standardize your nesting workflows to maintain a consistent depth.
How does cervical placement boost strength?
Nesting the cervical margins in the bottom third of the disc ensures the restoration is anchored in high-strength, low-yttria chemistry. This provides maximum fracture toughness where margins are thin and stress is high.
Look:
- Tetragonal margins resist micro-chipping during milling and shipping.
- Margins maintain precise dimensions during the high-heat sintering cycle.
- The stronger base provides excellent resistance to torque during clinical seating.
Can bad nesting ruin a multilayer block?
Yes, bad nesting completely neutralizes the benefits of a graded disc by placing weak, translucent material in areas that demand high strength. For example, placing bridge connectors in the incisal zone will cause premature failure.
The catch?
- Saving disc space at the expense of proper nesting height compromises safety.
- Arbitrary positioning defeats the engineered layout of the gradient.
- Your lab SOPs must prioritize mechanical positioning over material yield.
Key Takeaway: Standardizing your CAM nesting protocols to align incisal edges with the translucent top layer guarantees consistent aesthetics and structural safety.
| Disc Zone | Chemical Phase | Translucency Range | Primary Indication |
|---|---|---|---|
| Top (Incisal) | 5Y (Cubic) | 45% – 50%+ | Incisal Halo, Veneer Faces |
| Middle (Transition) | 4Y (Mixed) | 41% – 45% | Connector Locations |
| Bottom (Cervical) | 3Y (Tetragonal) | 35% – 40% | Margins, Load-Bearing Prep Seats |
Analytical Guide: Program CAM templates to lock the incisal 1/3 of anterior crowns within the top 20% of the disc volume.
What are the risks of post-sinter adjustments on 5Y Zirconia?
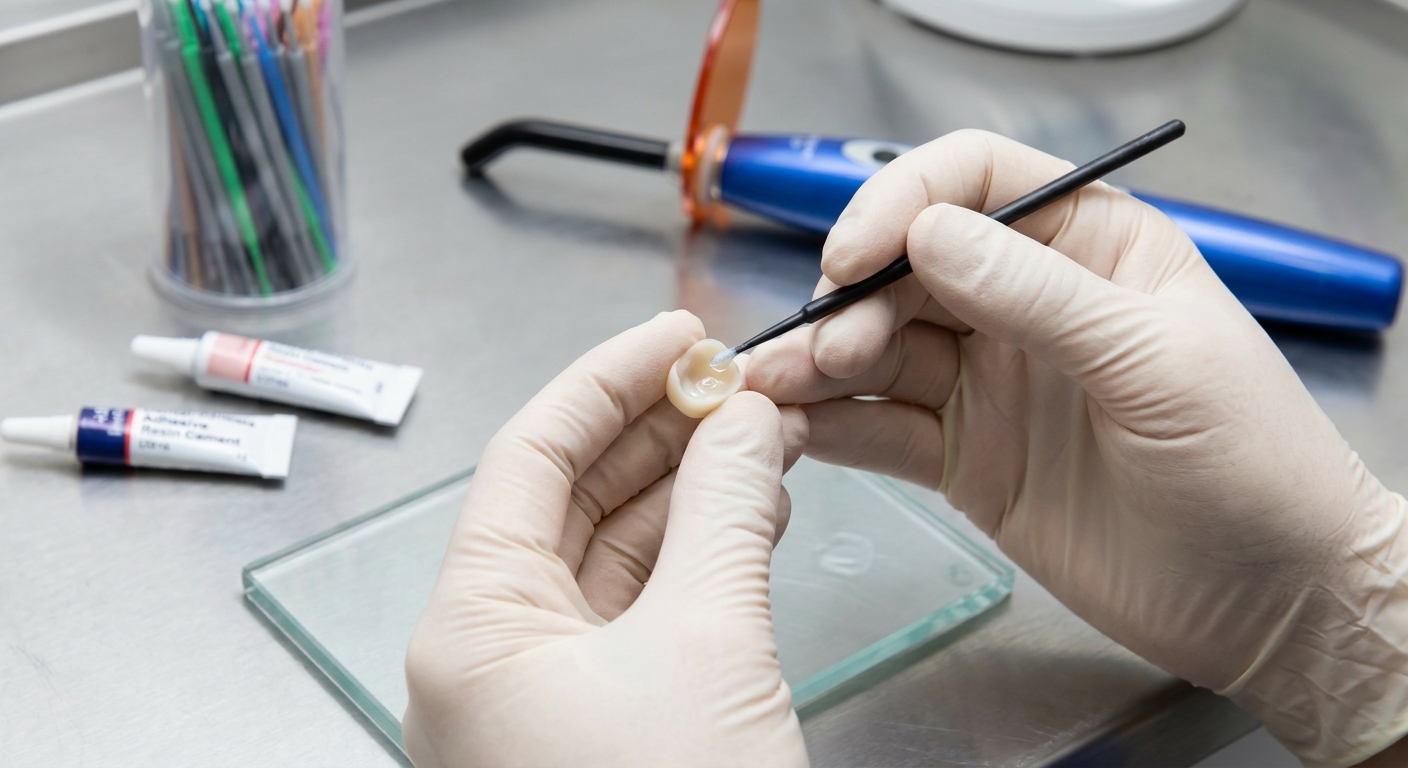
Post-sinter adjustments introduce severe risks of localized microstructural destabilization and micro-cracking that can lead to sudden clinical failure. Because 5Y Zirconia lacks the transformation-toughening mechanism of 3Y, any micro-fissures you introduce during grinding will remain permanent weaknesses. This makes precise tool selection and heat management critical during post-processing.
Aggressive handpiece techniques generate rapid heat buildup that damages the crystalline lattice of high-yttria materials. Understanding these physical limits helps you preserve structural integrity during final adjustments.
How does grinding trigger phase transformation?
Aggressive grinding generates high localized friction and stress that can trigger uncontrolled phase transitions or surface peeling. In high-yttria materials, this stress cannot be absorbed, leading to immediate crack formation.
The catch?
- Traditional carbide burs create intense local heat that damages the crystal lattice.
- Micro-cracks propagate silently beneath the polished surface.
- These cracks expand under oral temperature swings and chewing forces.
Which tools prevent micro-fracturing?
To prevent micro-fracturing, you must use fine-grit, polyurethane-bonded diamond polishers or water-cooled lab turbines under light pressure. These specialized tools keep the surface temperature within safe limits.
Look:
- Avoid using coarse stones or un-lubricated carbide burs.
- Keep your handpiece speed strictly under 10,000 RPM.
- Let the tool do the work without applying heavy physical force.
Why is heat management critical?
Heat management is critical because zirconia has exceptionally low thermal conductivity, which traps frictional energy at the point of contact. This heat buildup can cause localized reverse phase transformations that ruin marginal adaptation.
Think about it:
- Temperatures exceeding 900°C trigger immediate crystalline failure.
- Slow cooling protocols are necessary if any heat-generating work is performed.
- Implementing a strict post-adjustment polishing SOP is essential.
Key Takeaway: Eliminating aggressive post-sinter grinding and utilizing specialized, low-heat diamond polishers prevents invisible micro-cracks from compromising restoration integrity.
| Grinding Tool Type | Recommended RPM Limit | Thermal Risk Level | Micro-crack Propensity |
|---|---|---|---|
| Coarse Carbide / Stone | Not Recommended | Extremely High | High |
| Water-Cooled Diamond | 15,000 RPM | Moderate | Low |
| Polyurethane Diamond | < 10,000 RPM | Very Low | Minimal |
Analytical Guide: Restrict all post-sinter manual adjustments to fine-grit diamond polishers operated under constant irrigation or low speed.
How do you choose the right cases for using 5Y Zirconia?
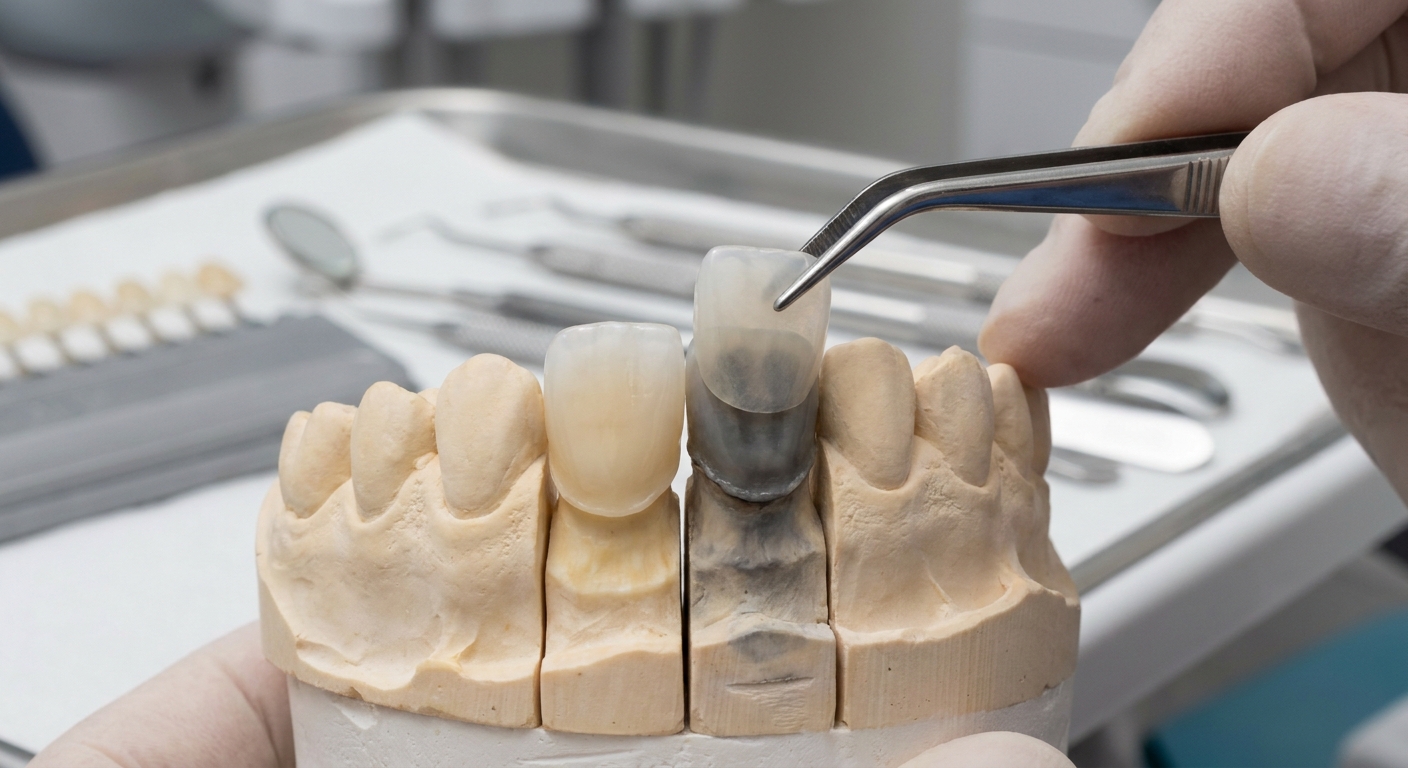
Choosing the right case requires you to assess the patient’s occlusion, restoration geometry, and cosmetic expectations to ensure long-term clinical success. By reserving 5Y Zirconia for highly aesthetic, low-stress applications, you can deliver natural-looking restorations that perform reliably. For structural frameworks, you must transition to higher-strength material alternatives.
Unpredictable clinical outcomes occur when material selection is treated as a secondary step in the workflow. Establishing a clear indications protocol prevents high-stress placements of weaker materials.
When is 3Y the only safe option?
Traditional 3Y remains the only safe option for long-span posterior bridges, implant-supported frameworks, and ultra-thin restorations where strength is paramount. These high-stress scenarios demand maximum fracture toughness to resist flexing and catastrophic failure.
Look:
- Multi-unit bridges require structural rigidity to protect abutment teeth.
- Screw-retained connections generate intense stress during torque and seating.
- Under-reduced prep scenarios do not leave enough space for aesthetic materials.
How do you design for anterior bridges?
Designing for anterior bridges requires you to strike a balance between structural strength and natural aesthetics. You should utilize graded 4Y/5Y discs to ensure the connector regions sit in the stronger zones while the incisal edge remains highly translucent.
The catch?
- Fully 5Y bridges often fail at the connectors due to insufficient toughness.
- Graded discs allow you to place connectors safely in the lower, tougher layers.
- You must communicate clearly with dentists who request monolithic 5Y for long bridges.
What is the ideal recipe for single units?
The ideal recipe for single units is to select high-yttria materials for anterior crowns and veneers, while using graded multilayer materials for posterior crowns. This approach ensures you achieve maximum aesthetics without risking structural failure.
Think about it:
- Anterior single units can be designed safely in monolithic 5Y.
- Posterior single units benefit from the stronger cervical core of multilayer discs.
- Veneers require adhesive bonding protocols to reinforce the thin material.
Key Takeaway: Selecting your material based on clinical indication—reserving 5Y for low-stress aesthetic zones—ensures optimal cosmetics without compromising structural safety.
| Clinical Indication | Ideal Material Selection | Sintering Method | Recommended Bonding |
|---|---|---|---|
| Anterior Veneers | 5Y Zirconia | Standard Cycle | Adhesive Resin Cement |
| Posterior Single Crowns | Graded Multilayer | Speed / Standard | Conventional or Resin |
| Long-Span Bridges | 3Y Zirconia | Standard Cycle | Conventional Luting |
Analytical Guide: Match the restoration type to the corresponding yttria level to balance aesthetic and structural demands perfectly.
What mechanical values should you look for in 5Y Zirconia?
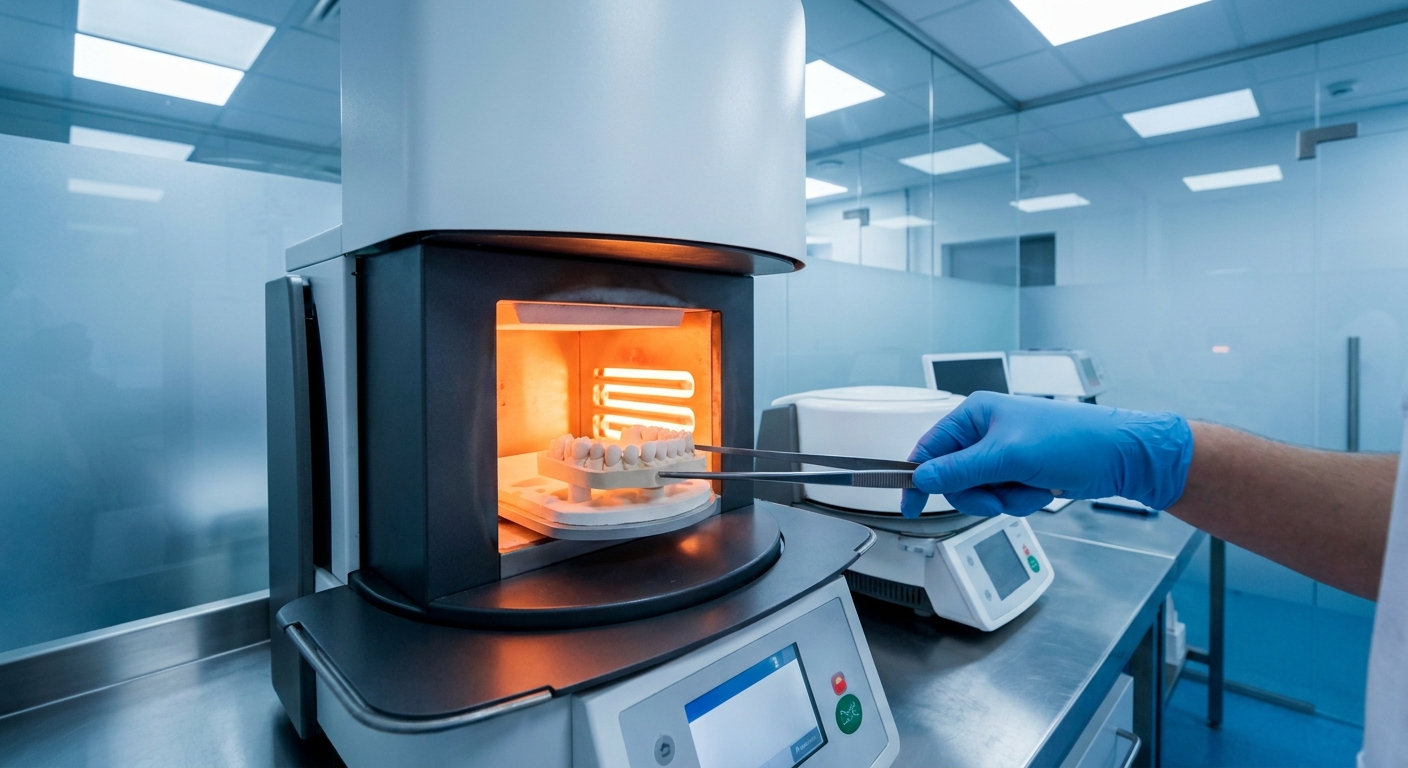
You must look for comprehensive multi-value technical sheets rather than single, inflated marketing numbers to evaluate a material’s true strength and predictability. Many manufacturers publish only the maximum strength of their cervical layer, which hides the lower mechanical limits of the incisal zone. Understanding how testing methods and sintering temperatures alter these values is essential for proper material selection.
To protect your laboratory’s reputation, you must verify the full mechanical profile of your material inventory. Aligning your sintering parameters with these specifications guarantees predictable outcomes.
Why are single-value strength numbers misleading?
Single-value strength numbers are misleading because they fail to represent the actual physical differences across the layers of a graded disc. A multilayer block cannot have a uniform strength profile across its yttria spectrum.
Think about it:
- The cervical layer may test at 1,200 MPa while the incisal third is only 600 MPa.
- Standardized testing methods (3-point vs. biaxial) yield different results.
- Honest manufacturer sheets will always state a clear range of mechanical values.
What range of MPa is acceptable for 5Y?
An acceptable range for monolithic 5Y materials is between 600 and 800 MPa, which provides sufficient strength for single-unit restorations. Anything under 500 MPa must be restricted strictly to non-functional veneer structures.
Look:
- Consistent powder preparation is more important than a high peak strength value.
- The material must maintain stable toughness values over continuous cyclic testing.
- Verify these limits before putting new discs into your milling queue.
How do sintering temperatures affect final properties?
Sintering temperatures directly influence grain size and density, which alter the final strength and light transmission properties of the restoration. Deviating from the recommended firing cycle can lead to structural weakness or rapid aging.
The catch?
- Over-firing increases translucency slightly but dramatically lowers flexural strength.
- Incorrect cooling rates introduce thermal stresses that can cause spontaneous fracture.
- Calibrating your furnace regularly is necessary to ensure consistent material properties.
Key Takeaway: Verifying the full mechanical range of your zirconia and calibrating your sintering cycle guarantees predictable clinical performance and consistent aesthetics.
| Testing Variable | Ideal Target Value | Impact of Deviation | Sintering Influence |
|---|---|---|---|
| Incisal Strength | 600 – 700 MPa | Reduced values cause incisal fracture | High (affected by top temp) |
| Cervical Strength | 1,000 – 1,200 MPa | Low values lead to marginal chipping | Moderate |
| Density | > 6.02 g/cm³ | Under-sintering causes opacity and weakness | Critical (requires calibration) |
Analytical Guide: Regularly calibrate dental laboratory sintering furnaces to ensure the physical properties of the material match the technical specifications.
Elevating Restorations Through Crystalline Selection
To thrive in modern digital dentistry, you must move beyond the marketing noise and choose your zirconia based on structural geometry and mechanical reality. Selecting the proper stabilization level ensures your restorations satisfy both the aesthetic expectations of the patient and the long-term durability requirements of the oral cavity. At our production facility, we are dedicated to providing high-purity, phase-controlled zirconia blanks that maintain strict dimensional stability and exceptional optical properties. We understand the physical demands of modern CAD/CAM workflows and offer tailored solutions to help your laboratory deliver predictable, high-end outcomes. To integrate these advanced material solutions into your workflow and discuss your specific production requirements, contact us today to speak with our technical team.
Clinical and Technical FAQ
Can I use 5Y Zirconia for a 3-unit posterior bridge?
No, 5Y Zirconia is contraindicated for posterior multi-unit restorations. Its lack of transformation toughening and lower fracture toughness (2.5 to 3.5 MPa·m¹/²) makes it highly susceptible to catastrophic failure under cyclic chewing forces in the molar region.
What’s the best way to mask a dark tooth preparation?
The best way to mask a dark prep is to utilize a higher-strength, more opaque 3Y or 4Y core. If you must use high-translucency materials, ensure the preparation is reduced by at least 1.5 mm to allow sufficient material thickness, and utilize opaque resin bonding cements to mask the underlying discoloration.
How do I know if my sintering furnace is correctly calibrated?
You can verify calibration by utilizing specialized temperature-monitoring rings. If the shrinkage rate of your test rings deviates from the target dimensions, your sintering temperature is inaccurate, which can alter grain boundaries and compromise both translucency and flexural strength.
Can I use conventional glass ionomer cements with 5Y restorations?
Conventional luting cements are not recommended for 5Y restorations. Because high-yttria materials possess lower flexural strength, they require the reinforcement of adhesive resin bonding protocols to distribute stress and prevent micro-fracturing under load.
How do I know if a graded disc is high-quality?
A high-quality graded disc displays a continuous, seamless transition of both shade and strength under close inspection. Stepped or banded discs will exhibit distinct horizontal lines under operatory lighting and are prone to internal shear stress lines.